
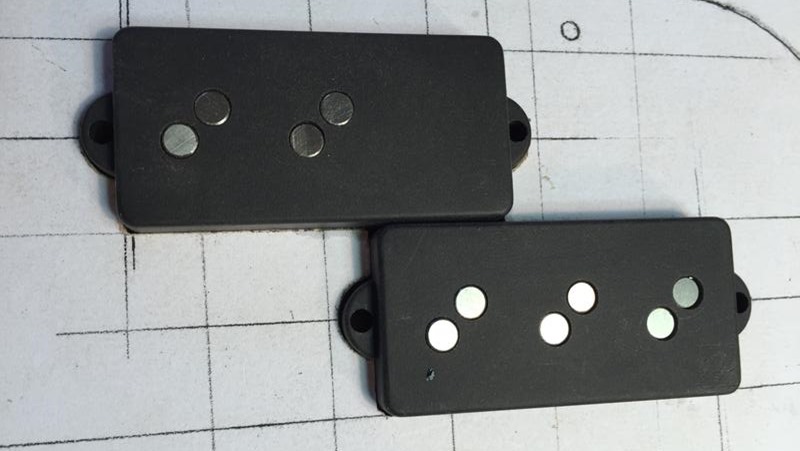
Note: Each half of this particular P pickup is 56mm long, but to make a template and include the nubs where mounting screws go, the drill points are 54mm center-to-center; this will make more sense as you read through this article. For any questions you have about this, please post a comment below.
Additional note: This is an older method of creating a template when there is no CNC machine nor computer available. A template of this type is done using plain old measurements and math.
Tools needed are a drafting mechanical pencil with the smallest lead point (such as 0.3mm) and drafting paper. Rulers, a drafting square, a circle template (because it is easier to draw small circles with the template compared to a compass,) and a straight edge are also needed, and a well lit drawing area, preferably under a strong work light.
Below: Close-up of the drawing of the P-Bass pickup.

Below: Back of the drawing is covered with double-stick tape and adhered to hardboard (which is what the template will be ultimately made out of.)

Below: Marking the center point. Note that the center point is the INSIDE line, which is a 1mm difference inboard from the edge of the actual pickup. The 1mm difference is particular to this specific pickup design, i.e. is it not universally true that a 1mm spacing will always fit.

Below: At the drill press using 1/2″ forstner bit (the forstner makes a very clean, accurate hole.) The template is being softly held in place by hand; the forstner bit will find its own way through the template cleanly.

Below: Hole has been cut.

Below: Second hole about to be drilled. Note: The pilot hole was made by the same forstner bit, but done with manual by-hand movement just to mark the point more prominently.

Below: Hole drilled. There will typically be a fair amount of hardboard waste on top of the template due to the fact the waste has nowhere else to go.

Below: Hardboard waste cleared, second hole drilled successfully.

Below: Drill press not running, but checking the location of bit to hole. Chuck is being rotated by hand to check the outside of the bit edge fits the drawn hole correctly.

Third hole drilled successfully.

Below: Another manual check of the bit to hole.

Below: Final hole drilled successfully.

In part 2, we will use a jig saw to cut away the proper P pickup shape, use files for adjustment and then fit the pickup to the template.
Where are the rest of the build steps?
You can view them all here.

Nice description/article, but is it just me, or does the high string marking look like it’s falling off the fingerboard? Sure there’s a little play with the dual pole pieces, if the spread in practice isn’t that wide, but if it is that would seem a red flag one should notice as you’re drawing it out.
Hey Joe, Good catch but yes there’s a reason it appears that way. It has to do with my process for making pick-guards. That pencil line for ‘fingerboard edge’ is way inside of actual cut line that I want. When I go to the band-saw and cut that line out out the pick-guard will still overhang into my neck pocket route considerably. After that I screw the pickguard to the body and use a bearing top bit on the router table to trim the pickguard edge perfectly flush to the neck route of the body. I will show all of that in a later step 🙂
Thanks for the update Max, that’s a nice idea for a great fit. Yeah that’s a process I’ve done a couple times with Floyd Rose installs to match the pickguard to the recess rout, but it never crossed my mind for matching the pickguard to the neck pocket. I guess that’s why we read the articles. 😉