
In a previous step, the neck blank was cut with a band saw, leaving a rough cut. At this point, we now smooth the neck.
The goal is to have the edges of the neck long and straight, and in addition make a good line to the headstock.
There is no one go-to tool that will magically smooth the neck as every woodworking project has different results. But there is one specific tool we will talk about in a moment that can make the smoothing process somewhat easier and safer.
For convenience’s sake, it is suggested to start with the more difficult parts of smoothing process. Generally speaking, the headstock is the more easier of the two to smooth while the edges are typically more difficult. Why? Because the edges are the straightest parts of the blank, while the headstock isn’t. Smoothing something to be straight is the challenging part.
Pattern sanding method
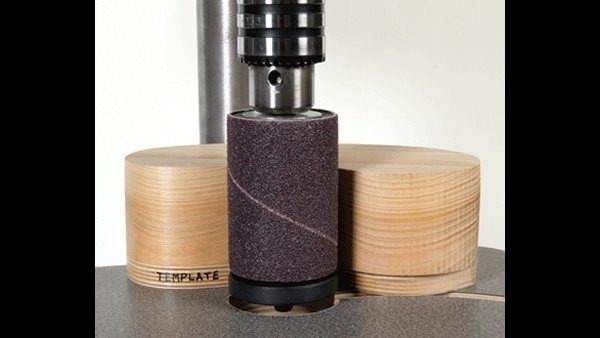
Pattern sanding involves a sanding drum with a bearing at the end of it. The tool that we use is called the Robo-Sander. More information on the Robo-Sander is here; it comes in three sizes, that being 1-inch, 2-inch and 3-inch. The one we are using is the 2-inch model, otherwise known as the RS-2050:

Robo-Sander RS-2050
While it is entirely possible to perform this type of sanding using a flush trim router bit, certain woods don’t “like” being cut that way and can result in breakouts, potentially not only damaging the work but also yourself. A species of wood that could have disastrous results by shaping with a flush trim router bit would be wenge. This is not to say that all wood species must be cut with a Robo-Sander, but it is the “better safe than sorry” sander to use.
Also know that the sanding method does take longer compared to use a flush trim router bit, and this is normal.
Known limitation of the Robo-Sander: It does not cut perfectly flush to the template, and you may see about a 1/16th” difference. Experienced users of the Robo-Sander compensate for this by purposely adhering the straight edge about 1/16th” inside the line. Your experience with this sander will vary as to how much inconsistency will be present.
Headstock
Compared to the rest of the neck blank, smoothing the headstock should be much easier. While the neck must be perfectly straight, the headstock is up to your interpretation as to how the shape should be (in addition, it is also much easier to cover up any mistakes that would be made, should any occur.)
Smoothing the headstock can be performed using a spindle sander, if desired. If you are not comfortable with that sander, the option is always there to sand by hand.
Can the entire smoothing process be done by hand?
Yes, but it requires patience, time, endurance and “the eye for it.” Obviously, it will take much longer to sand by hand compared to using electric tools. But even if you do have the time to do so, getting a perfectly straight line just from manual sanding isn’t exactly easy.
While it is romantic idea to build your guitar using nothing but old world methods that use no power tools whatsoever, there are times where use of power tools is the more practical option.
Ultimately, what you will discover is that there is a time for power tools and a time for doing things by hand. When it comes to this specific step, power tools are better for most of the neck smoothing. At the headstock, you may prefer to sand by hand, depending on what your headstock shape is.
Where are the rest of the build steps?
You can view them all here.


I would recommend against putting a side load on a conventional drill press unless you’re ready to catch the spindle as it flies off. Also the bearings are not meant for that unless it’s a high end industrial machine.
A spindle sander would be better. Or a drill/mill
Most spindle sanders oscillate, not a good choice. Build up the bearing with some tape to make up the 16th in. difference.