Inlay material
An inlay material can be almost anything as long as it can be installed in a fingerboard. Examples of inlay materials are plastic, abalone, mother-of-pearl, stone, shell, acrylic and so on.
Some examples of inlay materials (there are many):

However, the easy route is to use premade inlay set of discs for standard dot inlays.
Fretboard Discs (Dots)
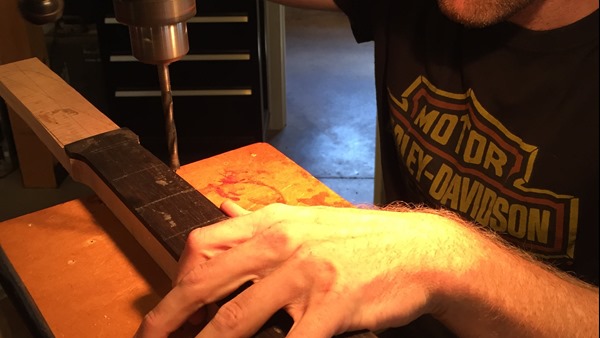
Premade disc sets for use as dot inlays are readily available, and also the easiest to install because the tool required to drill the hole into the fretboard for the disc to go into is a simple drill. A brad-point bit is recommended for cleanest installation.
Dot marker color considerations
You can choose anything you want for the color of your dot markers, but it should be noted that for easiest player use, a contrasting color works best. What this means is that if the fingerboard is a light color, such as maple, black markers work best. For darkly colored fingerboards, such as rosewood or ebony, light-colored markers work best such as white, off-white/shell, pearloid and so on.
Side Markers
Side markers are usually not the same material as fretboard discs/dots would be. The side marker material usually comes as a 1/16th-inch plastic rod.
The process of installation for a side marker is to cut your side marker hole first, then insert the rod material, then cut off the rod where the hole ends, clean up appropriately, then move on to the next marker hole until finished.
Installation notes and tips
Dot inlays are usually adhered to the wood with epoxy or superglue. Which should you use? Whatever you feel more comfortable working with.
It is important to note that fretboard discs will arrive to you flat, but your fingerboard is obviously curved as it is radiused. Therefore, it is important that when installing fretboard discs to have the top of the disc above the surface of the fingerboard so that when the discs are leveled, the disc can be shaved down to the shape of the fingerboard itself.
The easy way to position a dot marker between two frets
The difficult way is to measure the distance between two frets, calculate the exact center, then measure the distance from top-to-bottom of the neck, calculate that exact center, then draw a big plus-sign where the dot marker is supposed to go and install it there.
The much, much easier and faster way is to draw an X, using your start and end points as the top and bottom of the frets or fret slots, like this:

Doing it this way will guarantee an exact-center match every time, and the best part is that you don’t even need a calculator. You will also notice that by doing this, you can plot out the exact center of the fingerboard for when you want to put double inlay markers on the board, such as on the 12th fret. This is shown in the above photo.
Good source for disc and marker material
While there is a $30 minimum order for anything you buy at this particular place, when you want inlay materials that are exactly what you need with good selection available, this is the place to go.
Where are the rest of the build steps?
You can view them all here.